

Table of contents
What is floating parquet and why choose it?Main advantages:Tools and materials neededPrior preparation (key to a good result)Acclimatizing the materialHow to install floating parquet step by step1. Preparing the floor correctly2. Fitting the parquet planks3. Last row and trims4. Installing skirting boards5. Cleaning and initial careProfessional tips for a perfect finishFloating parquet maintenance: how to extend its lifespanDaily cleaning:Occasional cleaning:Key recommendations:Types of floating parquet: which to choose?🔹 Laminate parquet🔹 Multi-layer natural wood parquet🔹 Vinyl parquet (SPC or PVC)Common mistakes when installing floating parquetHow much does it cost to install floating parquet?Advantages of floating parquet in your homeDesign ideas with floating parquetWhen is it best to hire a professional?Is it worth installing floating parquet?Frequently asked questionsCan floating parquet be installed over tiles?How long does it take to install?Does it make noise when walked on?Can it be installed in kitchens or bathrooms?Installing floating parquet is one of the fastest, most economical and effective ways to renovate the floor of your home without complex works. In this guide we explain how to install floating parquet step by step, with professional tips, mistakes to avoid and key recommendations to achieve a long-lasting finish.
Whether you're a beginner or already have some DIY experience, here you'll find everything you need to do it right the first time.
What is floating parquet and why choose it?
Floating parquet is a type of laminate or wood flooring that is not fixed to the floor with adhesives, but is installed over an insulating underlay using a joining system (usually a click system).
This lets the floor "float" over the existing surface, making installation much easier.
Main advantages:
- Fast, clean installation (no work or glue needed)
- Suitable for almost any surface (tile, cement, terrazzo...)
- Good thermal and acoustic insulation
- Wide variety of designs and finishes
- Excellent value for money
Tools and materials needed
Before you start, make sure you have everything ready:
Materials:
- Floating parquet planks
- Insulating underlay (polyethylene foam or acoustic underlay)
- Wedges for expansion joints
- Skirting boards
- Mounting adhesive (for skirting boards)
Tools:
- Tape measure and pencil
- Saw (hand saw or jigsaw)
- Hammer and tapping block (optional)
- Level
- Cutter knife
Prior preparation (key to a good result)
Before installing the parquet, there's a step many people overlook that is essential:
Acclimatizing the material
Leave the planks in the room for 48 hours before installing them. This allows them to adapt to the temperature and humidity of the environment, avoiding warping afterward.
How to install floating parquet step by step
1. Preparing the floor correctly
A good base is essential for a professional result.
Cleaning and inspection:
- Sweep or vacuum the whole surface
- Mop the floor and let it dry completely
- Make sure there is no dampness
Levelling:
If the floor has irregularities greater than 2-3 mm, you need to apply a levelling compound. An uneven floor can cause noise or premature wear.
Installing the insulating underlay:
Lay a sheet of polyethylene foam covering the whole surface:
- Lay parallel strips
- Join the seams with adhesive tape
- Avoid overlaps
👉 This step improves acoustic and thermal insulation and protects the parquet.
2. Fitting the parquet planks
This is where the actual installation begins.
Installation direction:
It's ideal to lay the planks in the direction of natural light (from the window), as it improves the visual finish.
Click system:
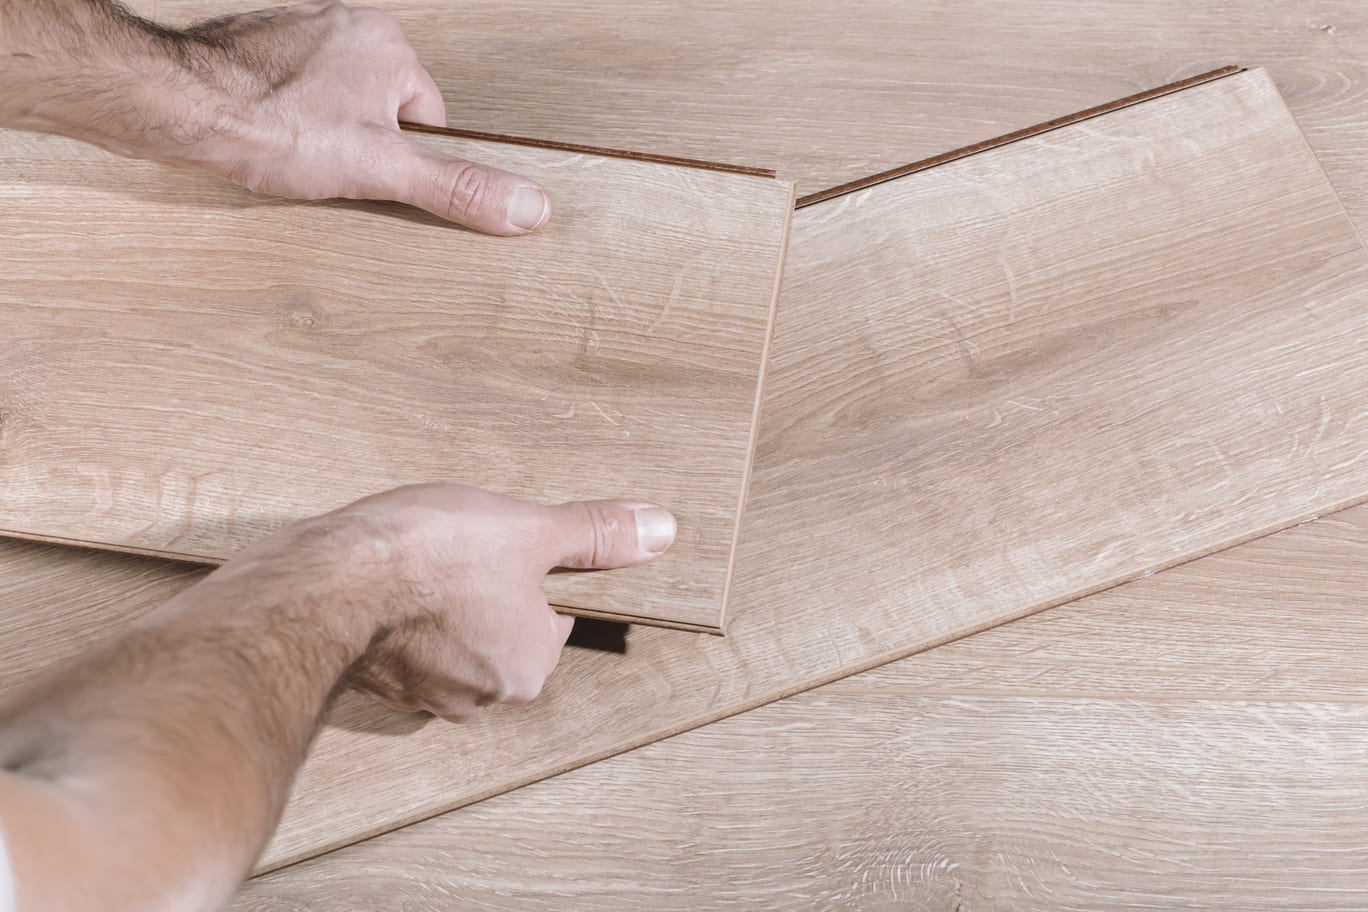
The planks are joined using a tongue-and-groove system:
- Insert a plank at an angle
- Press down until it clicks into place
- Continue row by row
Key points:
- Measure carefully before cutting
- Use a suitable saw to avoid splinters
- Stagger the joints between rows (staggered effect)
- Leave a gap of about 10-15 mm around the whole perimeter
- Use wedges to keep the gap
👉 This allows the floor to expand or contract with temperature changes.
3. Last row and trims
The last row usually requires lengthwise cuts:
- Measure the remaining space
- Cut the planks to size
- Always keep the expansion joint
4. Installing skirting boards
Once all the parquet is laid:
- Remove the wedges
- Install the skirting boards
- Fix them to the wall (never to the floor)
👉 This will cover the expansion joint and give a professional finish.
5. Cleaning and initial care
After installation:
- Clean up the dust generated
- Avoid wetting the floor for the first 24 hours
- Use products specific to parquet
Professional tips for a perfect finish
Although installing floating parquet is relatively simple, there are certain tricks that make the difference between a basic result and a truly professional one:
- Always start from the straightest wall: you'll avoid deviations in the rows.
- Use an installation kit (wedges, tapping block and pull bar): it makes fitting easier without damaging the planks.
- Avoid aligned joints: stagger the pieces for a more natural, resistant finish.
- Keep a stable temperature during installation (ideally between 18ºC and 22ºC).
- Cut the planks with the visible face facing down to avoid splintering.
👉 These small details improve the durability and final appearance of the floor.
Floating parquet maintenance: how to extend its lifespan
Once installed, floating parquet requires basic care to stay in perfect condition for years.
Daily cleaning:
- Use a vacuum cleaner or dry mop
- Avoid hard brooms that could scratch it
Occasional cleaning:
- Use products specific to parquet
- Use a slightly damp mop (never soaking)
Key recommendations:
- Place felt pads on furniture legs
- Avoid dragging heavy objects
- Use rugs in high-traffic areas
- Control ambient humidity (ideally between 40% and 60%)
👉 Good maintenance can extend the life of parquet beyond 15-20 years.
Types of floating parquet: which to choose?
Before installing, it's important to know the different types available:
🔹 Laminate parquet
- The most economical option
- High resistance to wear
- Wide variety of designs
🔹 Multi-layer natural wood parquet
- More authentic finish
- Higher aesthetic quality
- Higher price
🔹 Vinyl parquet (SPC or PVC)
- Water resistant
- Ideal for kitchens and bathrooms
- Easy maintenance
👉 Choosing the right type will depend on the use of the room and your budget.
Common mistakes when installing floating parquet
Avoid these typical mistakes:
- ❌ Not leaving an expansion joint
- ❌ Installing over a damp floor
- ❌ Not levelling correctly
- ❌ Not acclimatizing the planks
- ❌ Installing without an underlay
👉 These mistakes can cause lifting, noise or long-term damage.
How much does it cost to install floating parquet?
The cost depends on whether you do it yourself or hire a professional:
- DIY (do it yourself): from €8–20/m²
- With professional installation: €20–50/m²
👉 The savings are considerable if you decide to install it yourself.
Advantages of floating parquet in your home
Besides its easy installation, this type of flooring offers:
- Adaptation to changes in temperature and humidity
- Warm, comfortable feel underfoot
- Easy maintenance
- Great durability
- Modern, elegant aesthetics
If you choose quality materials, like the ones we work with at Payresa, you'll get a resistant, natural floor with an excellent finish.
Design ideas with floating parquet
Parquet doesn't only serve a practical purpose, it's also a key element in home aesthetics:
- Light tones: visually enlarge the space
- Dark colors: add elegance and sophistication
- Wide plank format: modern style
- Herringbone or chevron pattern: an interior design trend
👉 Choosing the right design can completely transform a room.
When is it best to hire a professional?
Even though it's a DIY project, there are situations where it's advisable to hire a specialist:
- Very uneven surfaces
- Rooms with complex shapes
- Installations over large surfaces
- Use of high-end parquet
- Underfloor heating systems
👉 A professional guarantees a perfect finish and avoids future problems.
Is it worth installing floating parquet?
Yes, especially if you're looking to:
- Renovate your home without works
- Improve thermal comfort
- Achieve a modern finish
- Save on installation
It's one of the best options currently in terms of value for money.
Now that you know how to install floating parquet step by step, you can transform any room quickly and without complications.
Following this guide and paying attention to the details, you'll achieve a professional result even without prior experience.
Frequently asked questions
Can floating parquet be installed over tiles?
Yes, as long as they are level and in good condition.
How long does it take to install?
A standard room can be completed in 1 day.
Does it make noise when walked on?
No, if it's installed correctly with an insulating underlay.
Can it be installed in kitchens or bathrooms?
Yes, but it must be a specific moisture-resistant parquet.
We hope this article has helped you discover how to install floating parquet. Want to know the latest trends in space design? We'll keep telling you about it on our blog!